If you are here for the Stampendous, Imagine Craft post, my apologies the link seems to be broken, please click on home to take you to the correct page or click this link http://wp.me/p4yZfC-T

Welcome back to the Stampendous Stamps, ICE Resin® and Imagine Crafts®/Tsukineko® Blog Hop! We’re having so much fun combining our products for fantastic results! If you missed yesterday’s post you can find it HERE.
We know you’ll want to try this yourself, and to make that easy we’re offering a nice prize package this week! Three lucky winners will receive a package with:
• 2 – Stampendous Perfectly Clear Stamp™ sets with designs sized for jewelry or small project making
• 2 – StazOn™ permanent ink pads by Tsukineko® courtesy of Imagine Crafts® – yummy Ganache and the must-have Jet Black
• 1 – 30ml package of ICE Resin Jeweler’s Grade Self-Doming resin
• 1 – pkg Suzan Lenart Kazmer Art Mechanique Silhouettes in Heart Shape
• 1 – pkg Kristen Robinson Rue Romatique bezel(s) (styles vary). WOW!! You’ll be crafting some awesome jewelry in no time!

How to Hop:
Each day we’ll post the designers participating in the Blog Hop. Click on each one and check out their project. Leave a comment on their blog that lets them know you really looked at their project. We ‘ll draw three blogs at random from the four days, then randomly draw one commenter from each blog. You must have a U.S. mailing address to win, but we’d love for everyone to hop and comment! You can check out the Official Rules for all our contests if you have questions.
So let’s get hoppin! Here’s who is posting today:
Imagine Crafts
Cathy Andronicou
Sharon Morrison
Stampendous
Jennifer Dove
Kristine Reynolds
ICE Resin
Polly Hendrickson
Jen Cushman
***Blog Hop Hint – if you click on a link that takes you to a page saying something like, “Sorry this page cannot be found,” just click on the header at the top of the blog (usually a picture, or the blog’s name), and it will take you to that blog’s most recent post. That post *should* be our hop. If not, you can probably scroll down a short way to find the hop post.
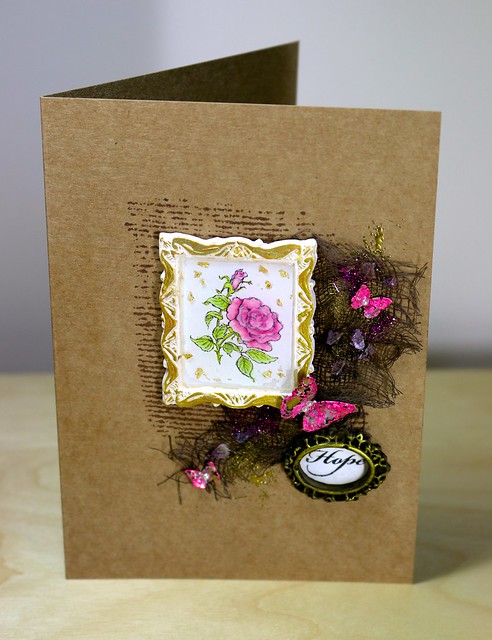
Materials used in this project:
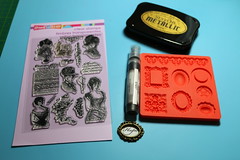
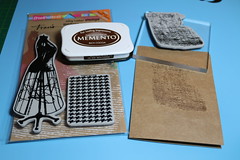
Imagine Crafts/Tsukineko Memento Tuxedo Black and Rich Cocoa Die Ink, Memento Dual Tip Markers New Sprout, Pear Tart, Angel Pink and Rosebud, Staz On Metalic Gold Ink, Gold Embossing Powder, Creative Medium Original, Java Walnut Stain and a Bullet Tip Fantastix.
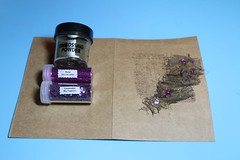
Stampendous: Stack Art Elements Kit (Rose Ultra Fine Glitter, Lavender Mica Fragments), Vintage Ladies Clear Stamps and Dress Form cling stamp set.
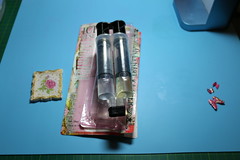
Ice Resin: Iced Enamels Medium, Iced Enamels Relique Raspberry and Ice Resin syringe.
Other: Silicone Mould putty, K and Co Life’s Journey Frames Metal Art, Artcoe Sunshine Gilding Flakes, Plaster of Paris, Modge Podge Mould Ornaments, Calico fabric, Martha Stewart Butterflies punch, Pearls, Metal, Kraft and White Card.
Don’t forget to leave a comment to be entered into the prize draw , thank you for visiting my blog today, if you want to see more projects relating to my design team posts then please check out my other blog HERE. Now for that promised step by step photo tutorial.
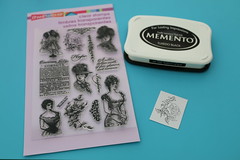 Stamp rose onto white card using Memento Tuxedo Black ink.
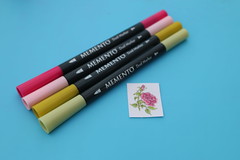 Colour rose using Memento dual tip markers.
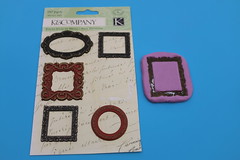 If you don’t have any bezels you can make a silicone mould from the metal frame
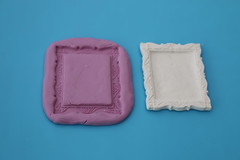 Pour plaster of paris into mould and once set remove and sand off any rough edges.
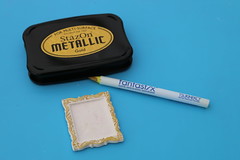 Colour raised design of frame with Staz On Metallic Gold using a Fantastix.
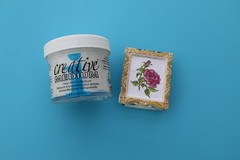 Stick rose image into frame using creative medium
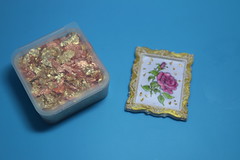 Add gold flakes to edges.
 Add Ice Resin to the centre of the frame and leave over night to set.
 Punch butterflies from metal and paint with medium add Relique Raspberry enamel and heat.
 Make frame from plaster of paris, colour with Java Walnut Stain spray and Gold Staz on mount onto stamped sentiment.
 Stamp background onto kraft card with Rich Cocoa ink.
 Colour calico with Java Walnut stain, add to card with creative medium. Sprinkle with embossing powder and heat set.
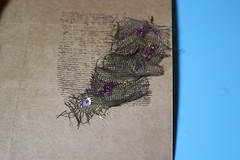 Add Glitter and mica fragments using creative medium.
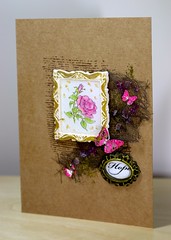 Adhere frames and butterflies and add pearls to design to finish.
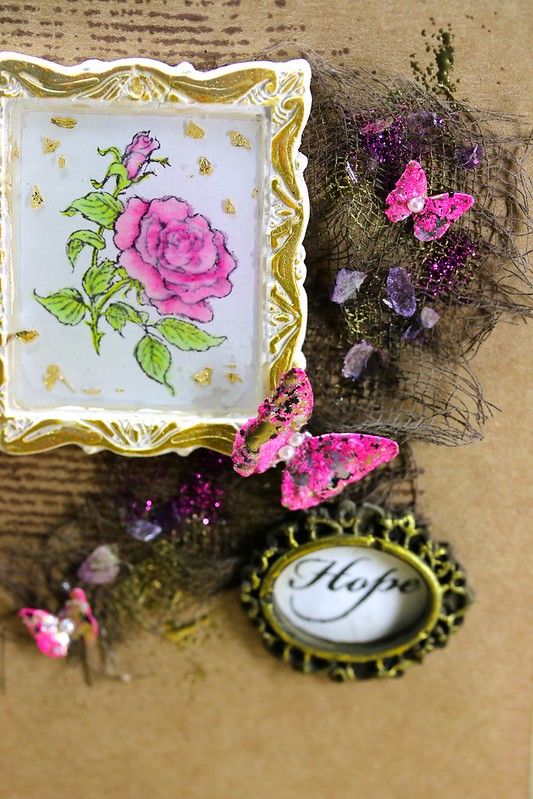
Finally here is a close up of the centre of the card, I just love all the texture the embossing powder, fragments, glitter and enamel create.

That is a gorgeous and elegant card. you really have to plan it out time wise. Great pictorial.
Pingback: ICE Resin, Stampendous, Imagine Crafts blog hop Day 2 : Ice Queen E-Zine
So cool! I love how you made the frame!!
Beautiful–I like the colors and texture.
Lovely card. The embellishments are fantastic.
Cathy you did an amazing job with this project – LOVE all the details in this project!
Awesome Pictorial! I am a visual learner & this is perfect! Beautiful card also!
wow! your project is phenomenal! you make it look so easy! LOL, I bet it is not!
How gorgeous!
Thanks for the
instructions and
I can maybe make
one!
Carla from Utah
Cathy, this is such a super fun project! Look at you all making your own bezels and stuff!! Love how your greeting came together so beautifully. Thanks loads for playing with us!
Love your use of the frames with this card. I happen to have the mod podge frames mold and this gives me some ideas!
wow, love the frames with the images and gold. but the butterflies and the open weave fabric are inspired, love it!
I really appreciate the instructions on making a bezel. What a joyful card to send someone undergoing treatments and show your support.
lovely card, so much love has gone into the design of this card. Using kraft as the card base, really pop’s your embellished card. usa mailing all good
What a beautiful card! I love your idea for making your own little frames! Way cool idea.
TFS!!
Love your card. So many possibilities. Thanks for the tutorial. I am going shopping for supplies now!
What a great way to add some extra pizzazz to my greeting cards. thanks for the great explanation on making it. I’m going to give this a whirl. Sounds like fun and something different.
I I like it! 🙂 I enjoy all the texture and glitter. Great embellisment. It could be framed as a piece of artwork. thanks, -con
WOW! FABULOUS!… love all the details and textures! You created some beautiful frames… TFS!
Pingback: Stamps and ink and ICE, oh my! | Jen Cushman
I never thought about replicating those little frames with mould putty. Great idea! Love your lovely card. It is just full of texture and pretty embellishments! Thanks for the wonderful tutorial.
Love the idea with the mould!
You did a beautiful job with all the details, everything looks amazing!
The pinks and purples in the flowers and butterflies would look great on a Mother’s Day card! Thanks for sharing!
OMG — you used clay! What a great idea!
This is so beautiful. Thank you for the instructions, I will be trying this technique. Love it!
Pingback: Waiting for the Literary Agents to Call – ICE Resin / Stampendous / StazOn Blog Hop : Ice Queen E-Zine
What a gorgeous card! I love the framed flower and the butterflies are delightful! TFS!
Not only is your card absolutely stunning, I love how you break it all down so that the reader (myself) is able to feel like they might achieve something as beautiful as you have! It’s very inspiring and I thank you for being a part of this magnificent 3 company event–I’m gaining so much from it and having a blast along the way!! Happy Weekend to you!!
I love it
Beautiful! The layering techniques are wonderful!
This is really lovely. Great idea for making your own bezel.
I love the glue stick molds. I need to look into the pink enamel. I have never seen that before? Looks real interesting!
Wow, I am so impressed! This card is amazing. Who knew you could make frames like that!! I love what you have done. Love the pink on the butterflies too, it looks awesome. Beautiful work, thanks so much for showing us the details. Thank you for sharing.
Katie B.
Pingback: Radiant Neon Blog Hop with Stampendous Day 2 | IMAGINE Crafts blog